Anhdv Boot has long provided good support for accessing server data on winpe. It is possible to Map Network data shared by the server into a drive on WinPE for ghost lan or to backup and restore data… see video at the end of the article.
See more about boot LAN with Anhdv Boot Premium
Nội dung bài viết
Preparatory steps for accessing server data on winpe
- Make sure your computer is connected to the same network as the server.
- Get the IP address or Hostname of your data server (eg ipconfig /all command on Command Prompt)
- Get user information authorized to share data (username and password).
- Check the shared folder on the server to see if it has enough access permissions and enabled sharing.
- This article creates the Test_Share_PE folder on the server (shared machine) and shares full rights for User TestPE.
If your server is a Synology NAS or equivalent, configure it further by following the steps below.
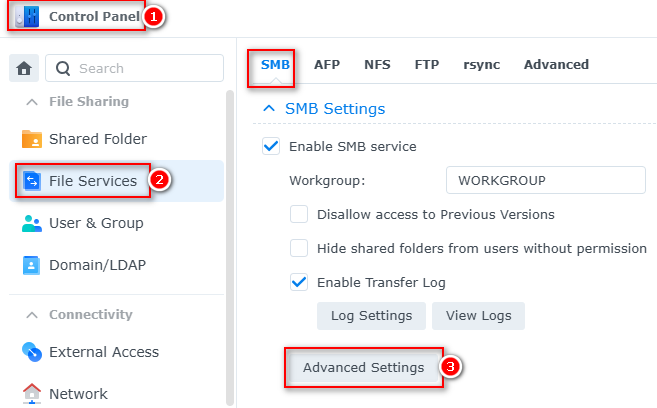
Select Advanced Settings
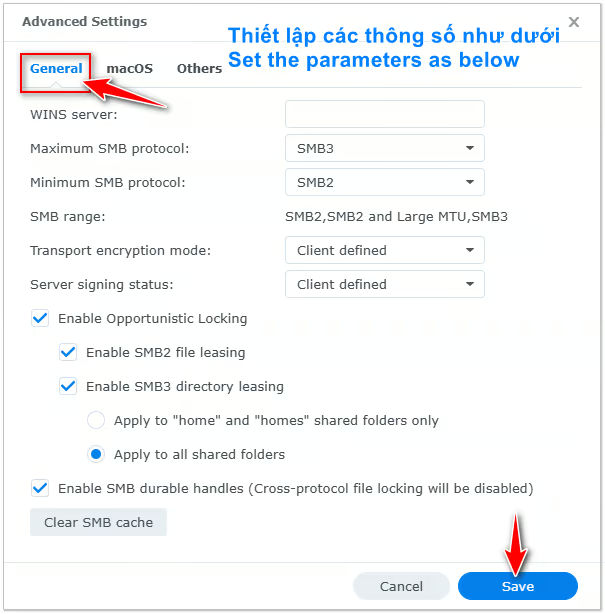
In the General tab, set the parameters as shown and select Save, if there is a warning, click OK. Switch to the Others tab
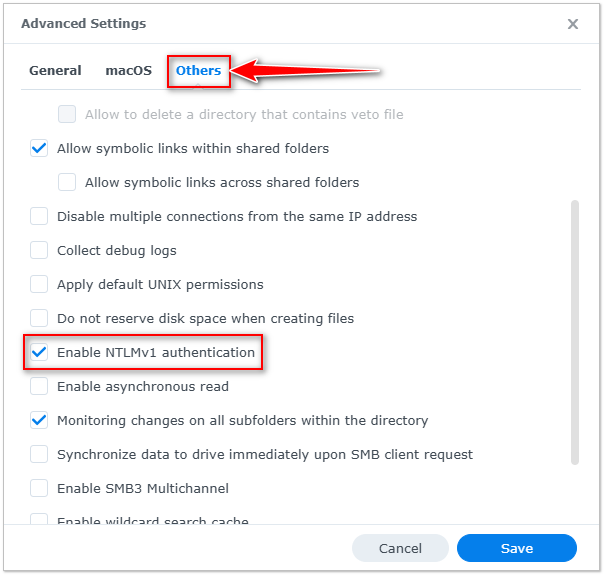
The most important thing is to check the box Enable NTLMv1 authentication > select Save to save.
How to Map Network to access NAS and server data with Anhdv Boot Premium
If you use Anhdv Boot Premium 2023 or higher, the simplest way to access server data is to right-click This PC on the WinPE screen and select Connect to Data Server
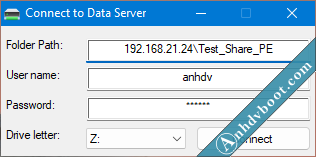
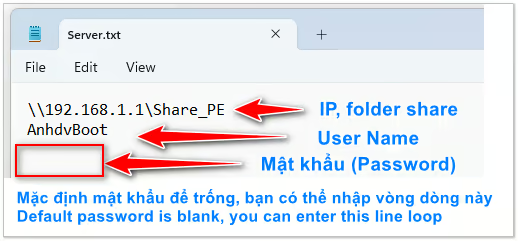
his tool can automatically import data cells as shown above if you set it up in advance at /Apps/OEM/Server.txt on USB.
After entering all the NAS or data server information, click Connect and you’re done.
Map Network Drive with PENetwork
Boot into Anhdv Boot’s WinPE, can be used via USB or directly from Windows. Note: use Win10PE or Win11PE to do this. See features of Anhdv Boot Premium.
Run the PENetwork software in the Taskbar or in the right-click menu.
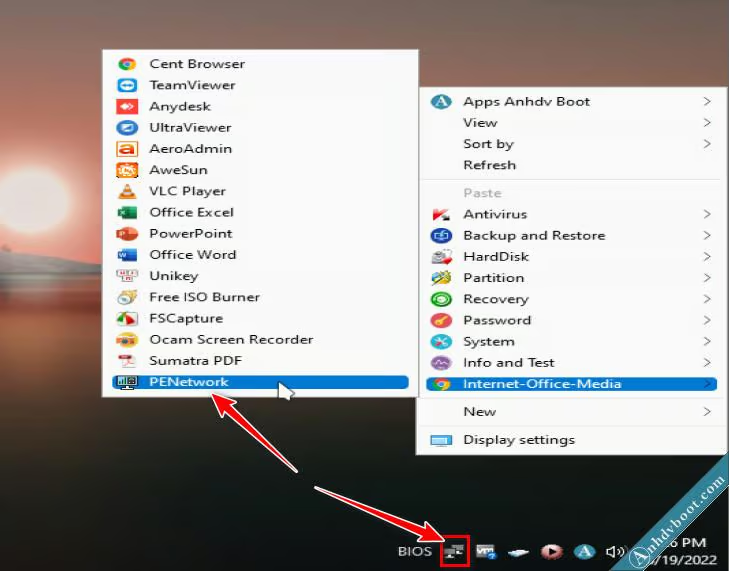
After starting the software, continue as follows:
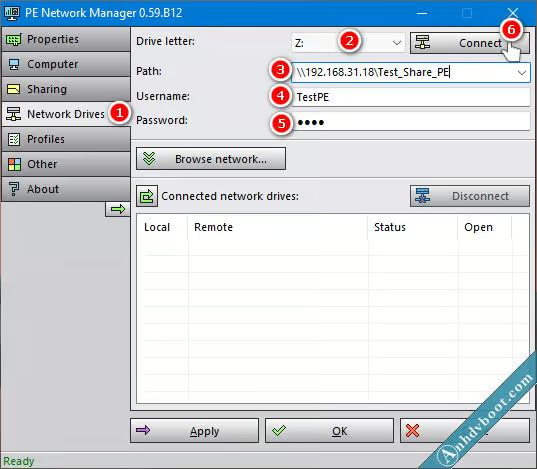
Select Network Drives. Set up Drive letter, Path, username, password one by one and then click Connect. As shown in the image above, I used the data sharing server IP in the Path section (enter the entire shared folder). You can choose any drive letter from the list, you don’t have to choose last like me.
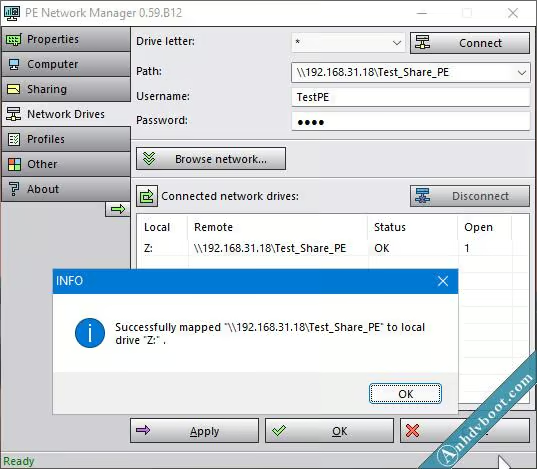
If successful, you will receive a notification as shown above. Click Ok to exit the window. The picture below is the additional server connection according to Host name in the Path section.
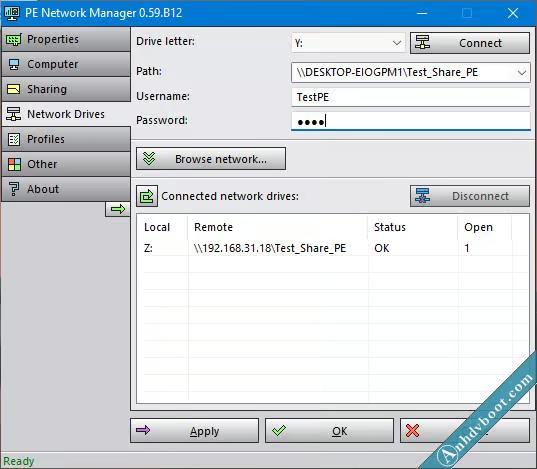
You can open This PC to check whether the shared server data has appeared or not (whether there is drive Z:\ and Y:\ or not)
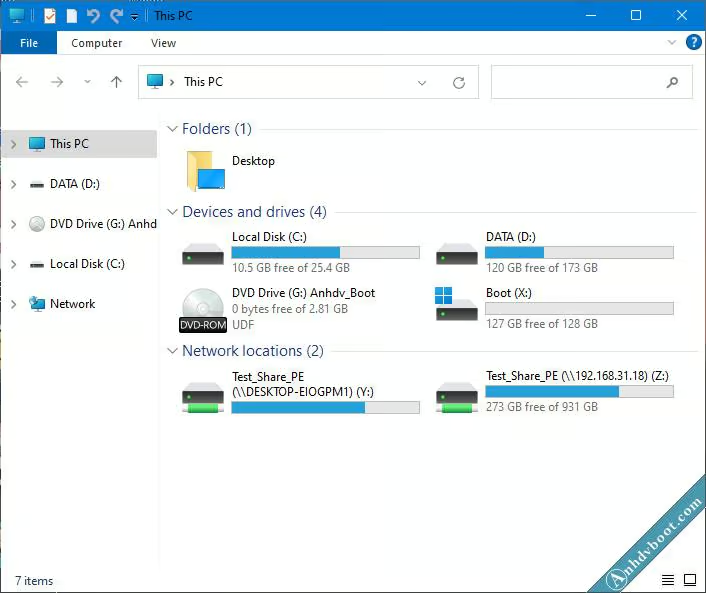
As you can see, you have successfully connected and mapped the server data to 2 network drives, Y:\ and Z:. Now you can ghost lan, backup or restore data as you like.
Conclude
Above is a simple way for you to access server data on winpe. Server data after being connected will become a network drive on WinPE. You can optionally ghost lan, backup or restore data via the server. Like Fanpage to receive the earliest information about other Windows installers. Wish success!

