From Anhdv Boot 2024 Premium version and above, it will be able to boot via LAN or PXE better than previous versions, supporting both UEFI and Legacy standards.
See also: Access NAS, map network drive
Nội dung bài viết
Some information about PXE (Boot LAN)
PXE (Preboot eXecution Environment) is an environment that allows a computer to be booted using a network card along with RAM. Simply put, PXE is a mechanism that allows starting software over the network. Anhdv Boot uses Tiny PXE to boot over LAN.
Image of iPXE Anhdv Boot 2024 Boot menu in Legacy mode
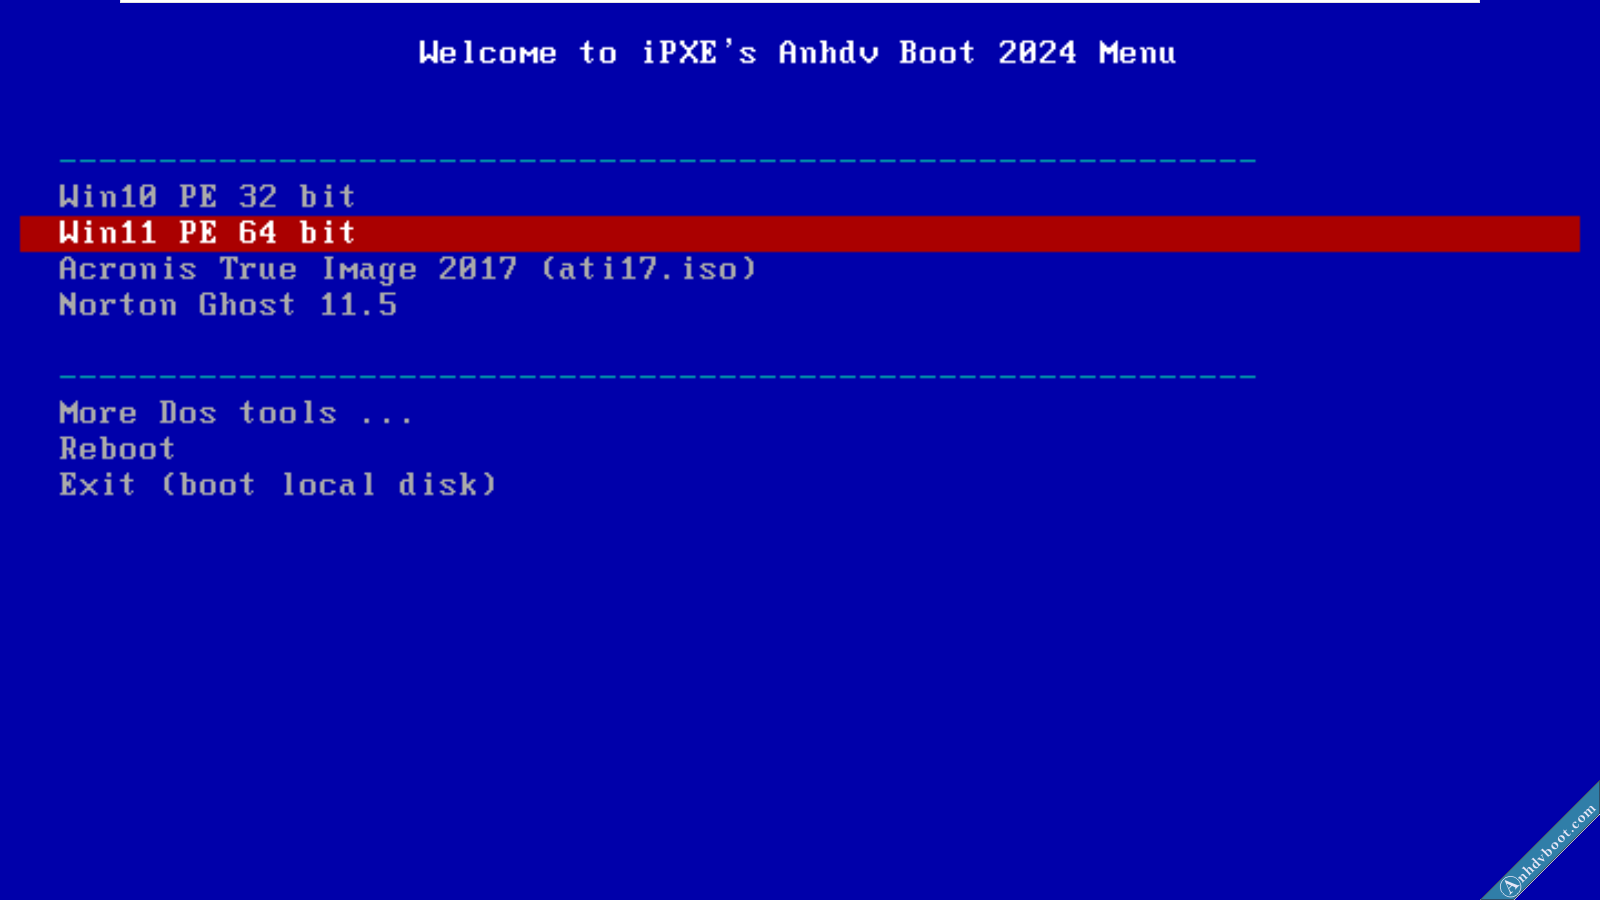
When booting Lan in UEFI mode, it will go straight to Anhdv Boot’s Win11PE.
Steps to prepare PXE Boot on the server
With a Server iPXE server computer, it should be used on a machine running full Windows to grant data sharing permissions more easily. There are 2 ways to run iPXE on the server:
- Use the USB or portable drive that created Anhdv Boot
- Extract the ISO file of Anhdv Boot on the hard drive
Instructions here will choose method 2. First, you should create a folder on the hard drive (should be created with a short name, without spaces or accents, best created in the root directory of partitions C, D, E …). I will create a folder named Boot_Lan located on drive D, copy the entire content of the Anhdv Boot ISO file into the newly created Boot_Lan folder.
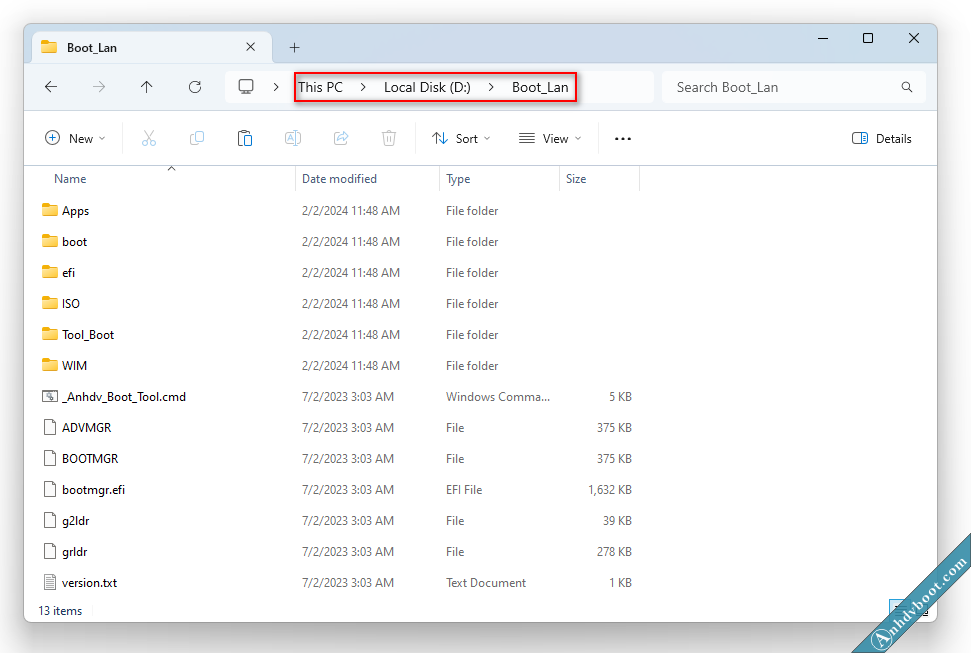
After copying the Anhdv Boot ISO content, copy your Premium KEY to /Apps/OEM. Next, you need to create a User with a password and share the Boot_Lan folder. You can use your current User, set a password if you don’t have one. The user I created is called TestPE.
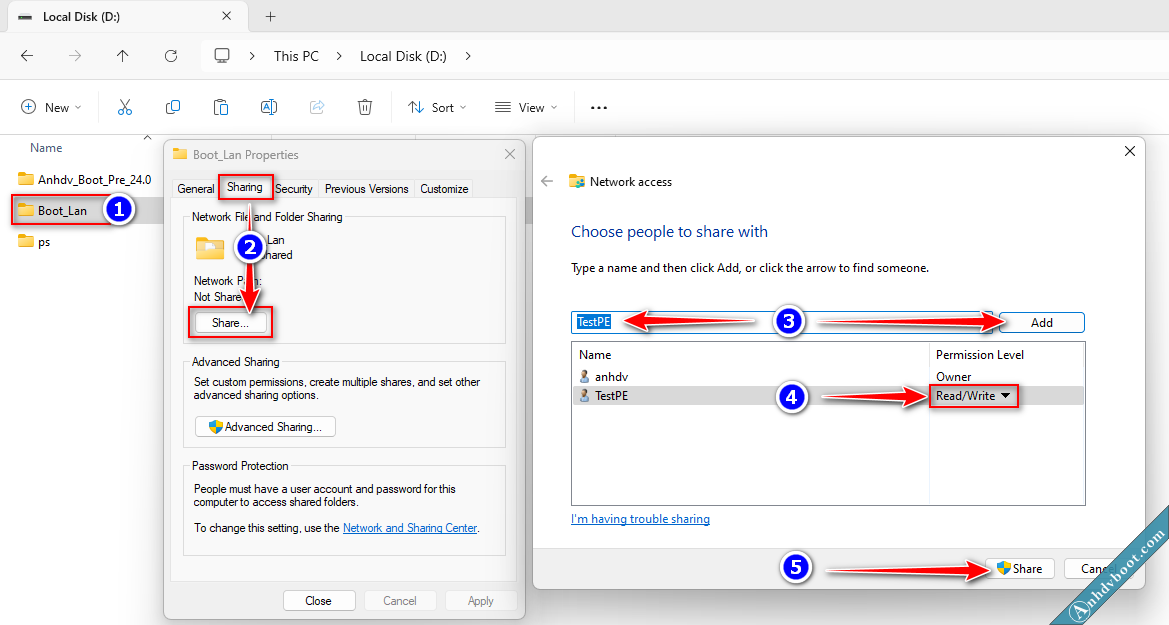
Right-click on the folder containing the extracted Anhdv Boot (here Boot_Lan), select the Share tab > select Share > enter your User name > select Add > Set permissions to Read/Write > Click Share to complete.
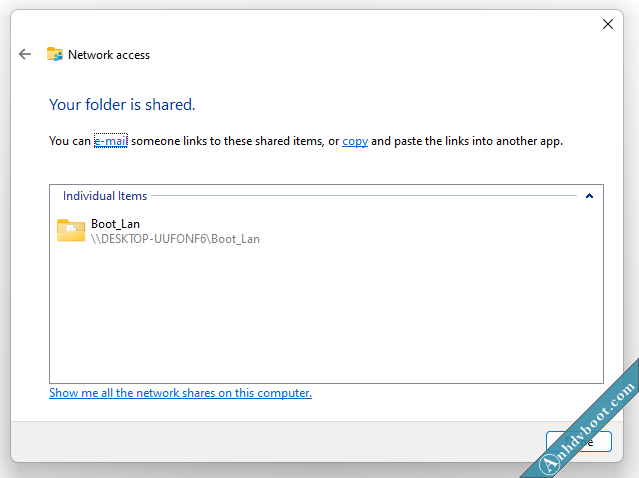
The result of the Boot_Lan folder has been shared. You will notice that it will have the path \xxxxx\Boot_Lan (mine is \Desktop-UUFONF6\Boot_Lan), remember this path so you can use it when entering WinPE. Additionally, you can use the machine’s IP address instead of “Desktop-UUFONF6” above. To get the IP address, do the following:
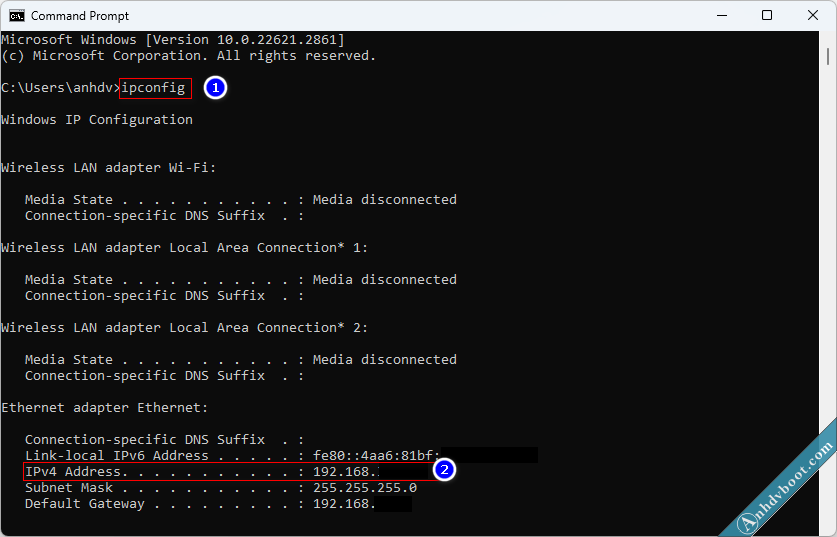
Run Command Promt, enter the command ipconfig, remember your IPv4 address. So the preparation steps on the host computer have been completed, followed by booting over the LAN from the client computer.
How to boot via LAN with Anhdv Boot Premium
Go to the Boot_Lan folder on the server
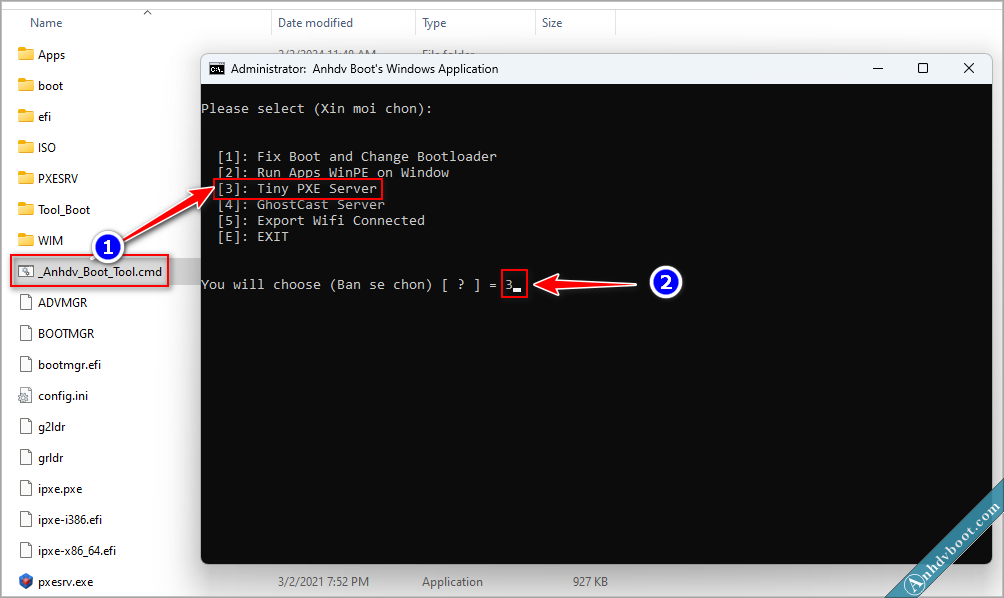
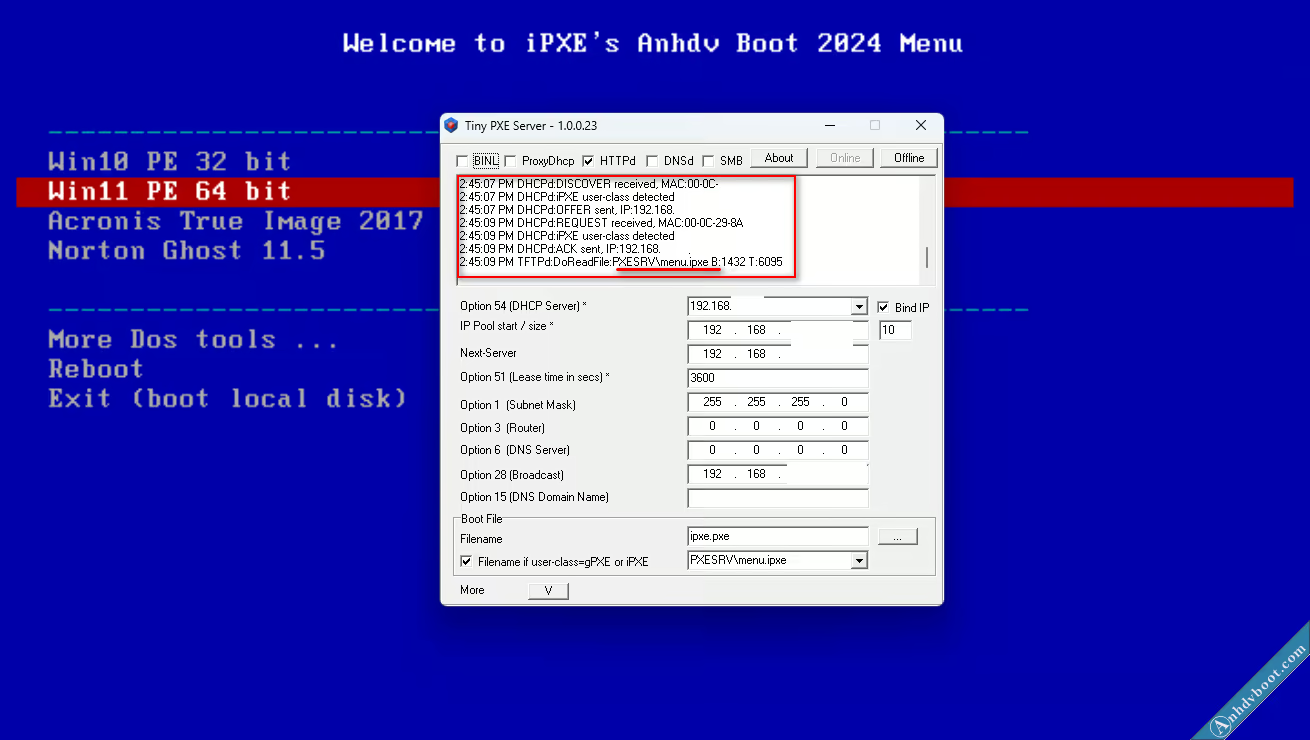
Run the _Anhdv_Boot_Tool.cmd file and select 3: Tiny PXE Server
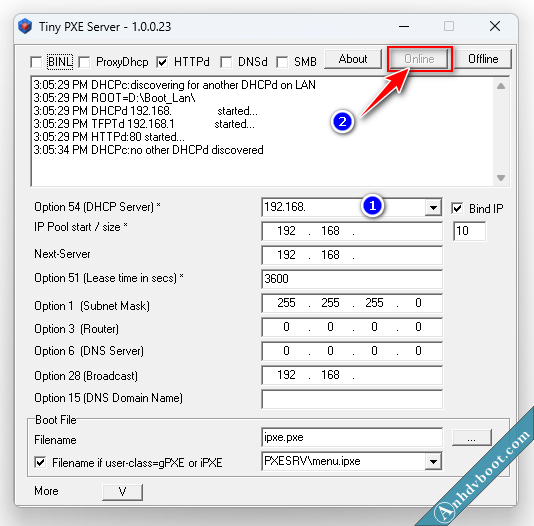
After selecting the DHCP Server (item 1) for the correct internal network, click Online. If there is a notification, select Allow to allow PXE to connect to the network.
Next, on the Client computer, make sure PXE mode is enabled in the Bios. Boot the client and choose to boot via LAN (choose from Boot Menu or set in Bios to prioritize PXE)
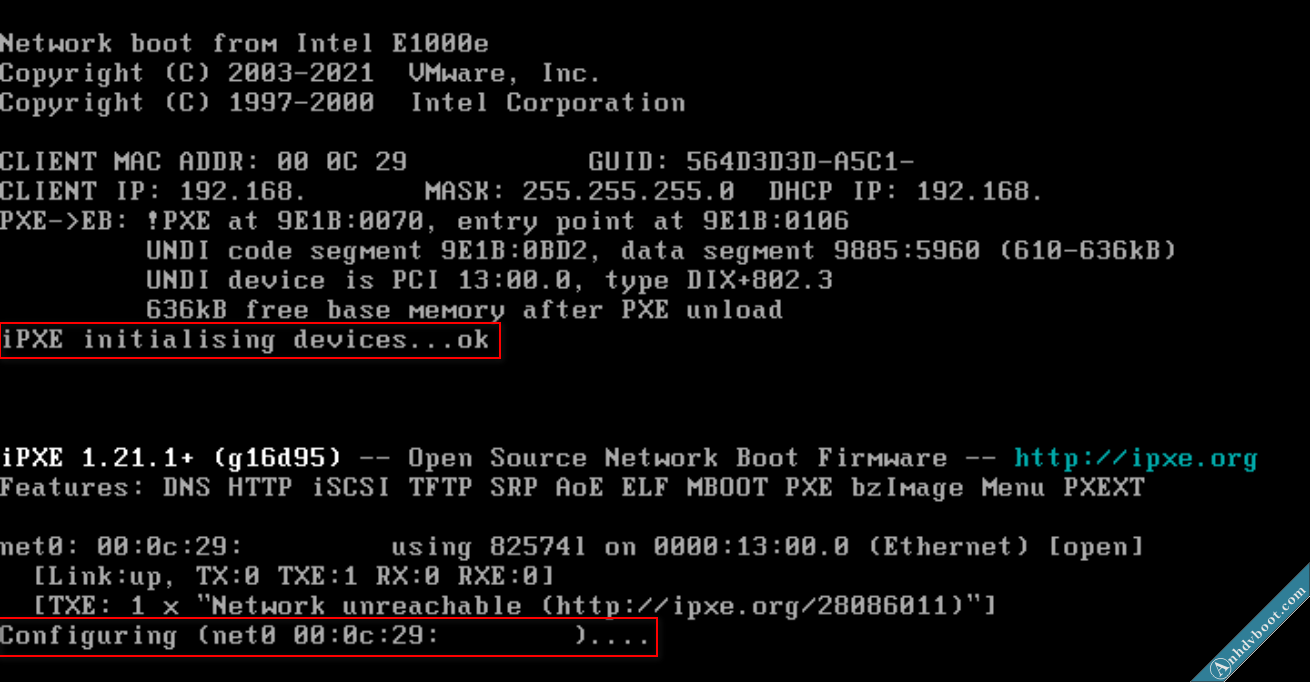
Whether or not the connection to the PXE Server is successful will display information as shown above
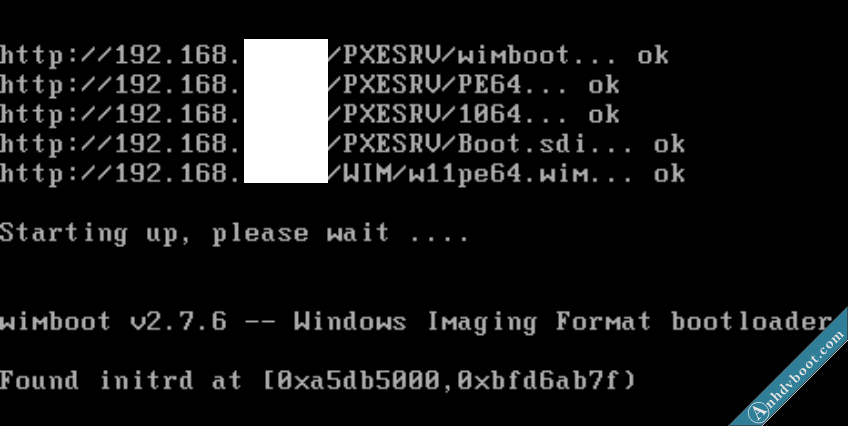
The process of loading and downloading files from the server
Anhdv Boot’s PXE Boot menu will look like the picture above, next I choose Win11 PE. Note, at this time the WinPE screen will only have a few applications because it cannot connect to the server’s Boot_Lan folder.
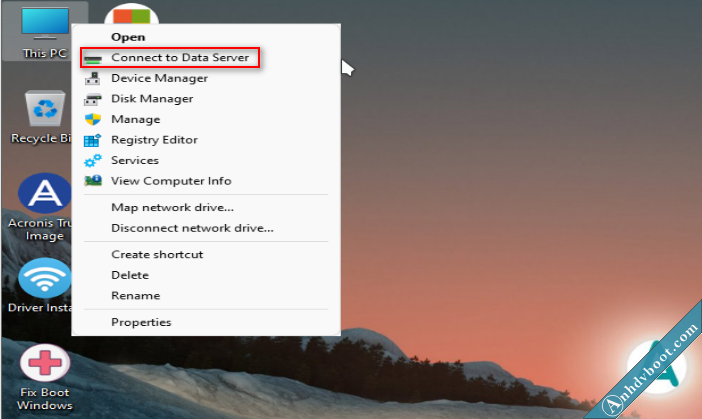
On the WinPE desktop, right-click This PC and select Connect to Data Server
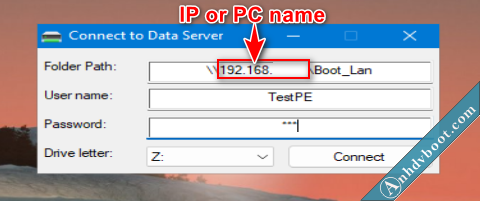
Enter Tiny PXE server information (IP address or Computer Name), Boot_Lan folder (Folder Path) > User Name (for example on TestPE) > Password > Click Connect

Next, right-click the screen > Apps Anhdv … > Reload Apps … (or press the shortcut CTRL + SHIFT + F) and all the software will appear.
Conclude
In this article, I show you how to boot from LAN (PXE) as simply as possible. Hopefully it can help some of you who often have to boot this way. You can Like Fanpage to receive the earliest information about other Windows installers. Wish success!


